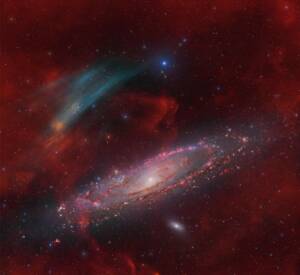
Discovery of the M31 [OIII] emission arc
Recently, a major discovery by an international team of amateur astronomers and scientists has become a huge online hit, and this new discovery is just located in one of the
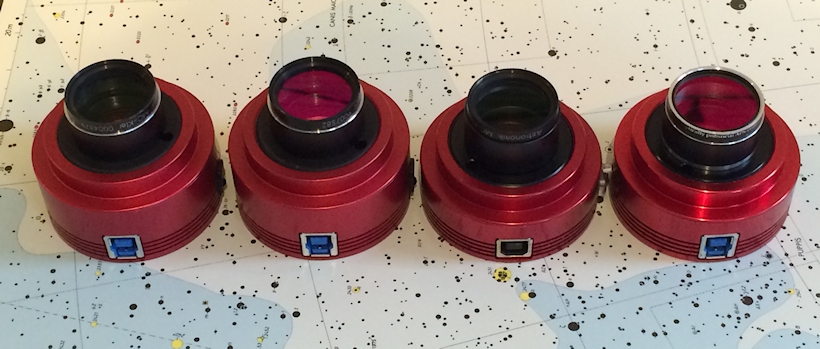
Maybe you have only one ASI Camera, but Martin has 4. Let’s see how does he use these 4 cameras. Source: Astronomy & Sky website of Martin Lewis – Imaging Cameras
My workhorse planetary digital video cameras for several years were DMK monochrome cameras from The Imaging Source,TIS; most recently these were based on the highly-sensitive 640×480 pixel Sony ICX618 CCD chip. Many of the earlier images on this site were taken with these DMK cameras. Times move on though and I sold the last of my DMK cameras in Spring of 2015 to help fund a move to owning a set of four ZWO, CMOS-based, digital video cameras.
I have found these ZWO cameras to be great planetary imaging cameras due to their ease of use, lower noise, higher speed, larger chip sizes and also the ability to select reduced areas of the chip to image with (so-called ROI operation). The customer and technical support for ZWO cameras is also much superior to that from TIS. ZWO is run by amateur astronomers who understand the needs of their customers and is highly innovative, improving their products and adding new products all the time.
I currently own the monochrome and one-shot colour (OSC) version of the ASI120 as well as monochrome and OSC versions of the ASI174.

The ASI120MM is a 1.2M pixel USB2.0 monochrome, digital video camera with a 1280 x 960 CMOS chip. The one-shot colour version, the ASI120MC/S, uses a similar CMOS chip but with a bayer colour filter matrix over the front. The S suffix means it a USB3.0 camera, capable of potentially higher speeds than the mono camera. The mono has a clear glass protection filter with a wider bandpass than the one-shot-colour camera- the latter incorporates a UV/IR blocking filter.
For both cameras the pixel size is 3.75um square, quite a bit smaller than the 5.6um of the DMK cameras I was using previously, and increasing the image scale by 50%.
These ZWO cameras are superb performers, great value for money and when Firecapture is used to drive them they are incredibly versatile. They have the following advantages over my earlier CCD based cameras;
I have both cameras fitted with very short 1.25″ adaptors which screw into the T-thread to C-mount adaptor on the front of each camera. A second protection filter is screwed into the front of this as further protection from the ingress of dust. Set up like this the two cameras are effectively parfocal so that I can use the colour camera to set up my ADC and use the same prism settings for the monochrome camera as I just used for the colour camera. This setting step using a colour camera is described on my ADC page
The cameras plug into an imaging chain shown below which includes (from L to R);


Often I use the OSC camera to help set up the ADC and then also capture with it and follow this with mono RGB imaging. Working like this the ADC is still usually correctly set for the mono camera as the focal position is unchanged when swapping the two cameras over. I can also use the cameras in combination for planetary imaging, such as using the red channel from the mono camera to replace the red channel from the colour camera or using the mono to capture a luminance channel to overlay on a colour image. They are a really versatile pairing when used like this.
These days I find that I am using the colour camera more and more in preference to the mono camera for planetary imaging. In the old days planetary imagers often turned their noses up at one-shot colour (OSC) cameras as their performance was often much inferior when compared to using a monochrome imaging with RGB filters. These days the quality of the colour bayer matrix in has improved to the point that when used with an ADC the colour camera’s performance approaches that of the mono camera. The mono camera always has the potential to produce the highest resolution images- I never got a red from the colour camera as good as the red from the mono camera (see my Jupiter from18th Feb 2014 for example) but the colour camera is much easier to use and in variable seeing, where the optimum focus changes all the time, is more likely to yield successful high quality final images. When you have a good colour video all three colours are ‘in the bag’ whereas for mono you have to hope the other two colour channels are good too- which often they aren’t. In addition, the colour camera is more productive. 10 colour videos produces 10 reds, 10 greens and 10 blues, whereas to capture this many of each colour with the mono camera would require 30 videos in total to be recorded.
Although the processing is much easier and quicker with the colour camera, each image is generally noisier, due to the lower light throughput and higher gain needed. As a result more images need to be stacked to reduce noise. Usually this is a matter of needing to stack 3 images rather than 2 images cerainly not 3x as many. With a colour camera it is important to keep the image scale up to ensure you have sufficient sampling of the image; although Autostakkert debayering claims to overcome this issue when it is used for debayering.
To get the best performance the colour camera needs to be used with an ADC if you want to get images approaching those of the mono camera (more on this on my ADC page). According to Chris Garry, author of Pipp (Planetary Imaging PreProcessing Program), if you want to use some of
these more modern debayer algorithms (not nearest neighbour) then it is essential that the three colour channels are aligned by use of an atmospheric dispersion corrector beforehand.
I also use my ASI120 cameras at the heart of my home-built All-Sky camera which you can read more about here.
The ASI1174MM/ASI174MC cameras are a pair of ZWO 2.3M pixel monochrome/colour cameras which use the 5.86um pixel Sony 174 chip which has an amazing quantum efficiency of 80%.
With their larger chips, these cameras were originally aimed at the solar and lunar imagers. It turns out, however, that they are also excellent planetary imaging cameras when used with a reduced chip area (so-called ROI [Region Of Interest] mode) to increase frame rate and reduce file size. They are inherently faster and more sensitive than the ASI120s (both are USB3.0) and do not suffer from the ‘fixed pattern noise’ issue, where you sometime get a vertically banded pattern of noise at high gain and high camera temperature for the ASI120’s. Another advantage of the 174 chip is that it has a global shutter rather than a rolling shutter which will be very useful for my attempts at ISS imaging (rolling shutter causes distortions to the shape of the ISS). ZWO have produced a nice information sheet on these cameras which you can see here.
The ASI174 cameras are supplied with front 2″ nosepieces which are 5mm longer than the ASI120s and a different arrangement for the protection window which make it easier to remove to clean the chip. In order to have four parfocal cameras I have removed the longer nosepieces and replaced them with low-profile nosepieces, like those on the ASI120s, where the front of the camera is 12.5mm from the chip (CS-mount distance) rather than 17.5mm (C-mount). This means that I can swap freely between any of the four ZWO cameras without the need to refocus or change ADC settings. The low-profile nose piece does not have a protection window but I have short 1.25″ adaptors with appropriate filters on the ends to keep the dust out. Another advantage of the low-profile nosepiece is the ability to use the cameras with my CS-mount fisheye lenses to try them as large area all-sky cameras.
Mounted in the same optical train as described above with one or two 2.7x barlow elements I get a larger image scale (smaller arcsecs/pixel) than with the smaller pixelled ASI120s. With the two different camera pairs and two different APM 2.7x barlow arrangements I actually get four different image scales which allows great flexibility to select my image scale appropriate for the object I am imaging. These different image scales are shown with other key camera details in the table below.


This is my Canon 500D DSLR that I got as a birthday present early in 2011 and which I have started using for astrophotography. The camera is unmodded (IR filter not removed) as I use it for daytime photography too. I currently use the image-stabilised Canon kit lenses that I got with the camera which are 18-55mm and 55-250mm focal lengths. These lenses give surprisingly good results given their low cost.
The camera on its modified Manfrotto tripod can be readily mounted on my equatorial platform for tracked shots such as those seen here. Further information on the equatorial platform including a picture of the tripod on the platform can be seenhere.
I can use an Astronomiks CLS (city light suppression) clip filter to reduce the effects of light pollution when using the DSLR. The clip filter sits in front of the flip mirror but with this in place the EFS lenses cannot be used as they foul the filter. I have the following lenses that can be used when the clip filter is in place;

Recently, a major discovery by an international team of amateur astronomers and scientists has become a huge online hit, and this new discovery is just located in one of the
I think most astrophotographers can trace everything back to one very specific moment — that first time looking through a telescope. For me, that moment happened when I was four

Hi everyone. My name is Alex, and I am an astrophotographer. I would like to start by thanking You for choosing my picture among all the great pictures You receive.
Why the Orion Nebula Never Gets Old – Each winter, stargazers return to this cosmic masterpiece to test new skills and relive the wonder. Explore the Orion region’s iconic nebulas,
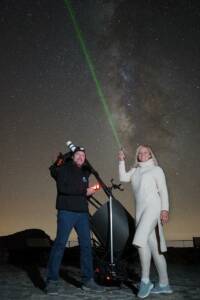
In 1994, I built my first fully functional reflecting telescope in Hungary with my own hands. In the former Eastern Bloc countries, telescopes still could not be purchased in stores
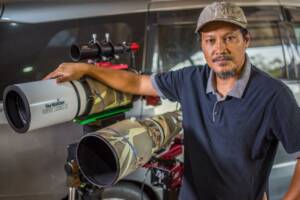
1.How It All Began I have been a fan of astronomy since high school.Starting from a school event where I can see the moon up close through a telescope.When I
3 Comments
Jason WAIT
Thanks for the post! I’m the proud owner of an ASI174MM myself. Hopefully you can answer my questions!
“In order to have four parfocal cameras I have removed the longer nosepieces and replaced them with low-profile nosepieces, like those on the ASI120s, where the front of the camera is 12.5mm from the chip (CS-mount distance) rather than 17.5mm (C-mount).”
I am interested in adapting my ASI174MM to work with a fisheye lense to become an all sky camera. I am also coping with the issue of being just out of “prime focus reach” when using my ASI+FilterWheel. Is there any way to ensure protection from dust and dew if i replace the nosepiece? Would you please link me to the low profile nosepiece that you used!
This means that I can swap freely between any of the four ZWO cameras without the need to refocus or change ADC settings. The low-profile nose piece does not have a protection window but I have short 1.25″ adaptors with appropriate filters on the ends to keep the dust out. Another advantage of the low-profile nosepiece is the ability to use the cameras with my CS-mount fisheye lenses to try them as large area all-sky cameras.
Is there a particular fisheye lens which works best for you? I would love to purchase one but I don’t know where to begin
Sam Wen
Hi Jason
the low profile nosepiece is the one on our ASI120 cameras. we can provide it if you need. please contact us through email
it can reduce the distance of interface to CCD by 5mm, I don’t know you can focus or not?
for fisheye lens for ASI174, its may a little hard to get at the market, because most lens is for small size sensor
Martin Lewis
Hi Jason,
Sam supplied the low profile nosepiece and he has told you how you can get one. With this nosepiece fitted a CS lens should focus okay with the ASI174 although you may possibly need to resort to also using thin (eg 0.25mm) C-mount brass spacer shims available from ebay.
The CS-mount 180deg fisheye lenses to make a good all sky camera that I know about are
-the Fujinon YV2.2X1.4A-2 1/3″ f1.4, 1.4-3.1mm zoom lens
-the Arecont f2 1.55mm lens
-the Rainbow L163VCS 1.6-3.4mm f1.4mm
Out of these the Rainbow lens will fill the big chip of the ASI174 the most fully but even so the circle of the sky is well inside the rectangular boundaries of the chip. I will post a picture of this on my website if you are interested. You can obviously use the ASI174 as an all sky camera with the Rainbow lens but you will just have to use an ROI setting so that you are using an area of say 1000×1000 to give a nice circle inside a surrounding box.
Hope that helps