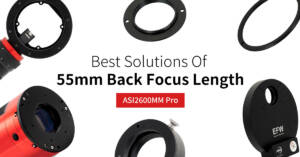
[ASI2600 Guide] 4 Connection methods to get 55mm back focus length
People are asking the connect methods of ASI2600MM Pro: How to use it with the new 36mm EFW? How to reach the 55mm back focus distance? What accessories I need
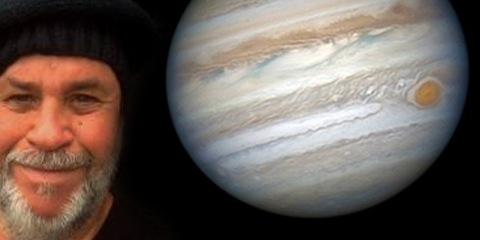
Our astronomical master series ushered in a consequential man in the field of astronomy, Darryl from Australia. Although he is nearly 70 years old, he still keeps a childlike heart (astronomy enthusiast) and eneretic all the time. (It’s also a challenge even for many young people to take the heavy equatorial mount and the C14 out for planetary imaging).
From ZWO ASI120MM camera, Darryl witness the growth of ZWO, he has almost all ZWO planetary cameras: ASI120MM ASI120MM-S,ASI224MC, ASI290MM, ASI174MM, the current main equipment of his is C14 and ASI224MC,ASI290MM.
How great Darryl is and how important he means to ZWO, let’s keep reading ; )
Q1: Hi,Darryl. Could you introduce yourself for everyone?
“Hi” to the readers here: I am almost 70 years old & my wife & I are very active “hi-res” planetary imagers who live in South Australia. Although I have always been interested (even obsessed!) with the night sky we were from a very poor family & I could only dream about what the planets looked like through a telescope, spending a lot of time in public libraries looking at books on astronomy & learning to navigate my way around the night sky. Upon my retirement from full-time work we have spent many hours imaging & refining both our capture, processing & equipment to get the utmost with what we use.
Q2: When did you start out in astronomy? And when did you have your first telescope? What’s the feeling in first observing?
I started as a young boy although I could not afford a proper telescope until I was a young adult – unfortunately even then the scope was not very good, but I was fascinated with the planets from a very early age & knew a lot about the sky & star patterns.
Moving around a lot & living in many different places while bringing up 3 sons with my partner Pat meant that astronomy was not something I could spend a lot of time on back then.
Q3: When did you start to do astrophotography? And what equipments did you use?
I only began seriously trying to image the planets in 2008 using a 6″ achromatic refractor and a pc webcam. (Phillips Toucam) Neither were very good “tools” but it got us started. 😉
This is a very early image using the 6″ achromatic telescope & a Phillips Toucam webcam – in it you can see Titan’s shadow crossing Saturn’s disk: compared to what we capture these days it is quite unimpressive but when you consider that I re-processed this data much later after I had learnt a lot about post-processing, you can appreciate the monumental amount of effort it takes to achieve some reasonable colour correction from a scope that has enormous chromatic aberration – & also just how much difference learning to use software properly can make!
I quickly realised an SCT would be much better & I have always been very dedicated, whatever I did; which meant I always strived for the best outcomes I could achieve: a Celestron C11 & a dedicated ccd camera (PGR Flea3) became our new equipment, allowing us to capture much better images. (I say “us” because my wife & partner for 50 years now, Pat, is an integral member of my team!)
Q4: When did you know about ZWO? And what’s the first ASI camera you had?
In 2012 a young man named Sam Wen must have seen some of our images on the internet, using a PGR Flea3 ccd camera. He sent me an email telling me about the cmos cameras he had put together & why he thought they would be as good – if not better – than the Flea3. He asked me if I would be interested in trying out one of them as a test camera, sending me some of his own image samples & test results.
I must admit that I took some time to be interested because the Flea3 was the best planetary imaging camera in use back then & all the good images at the time were captured with these ccd cameras. But I liked the fact that an active amateur astronomer was engaged in camera research & development so I agreed to try one of Sam’s camera whereupon he sent me one of the original ASI120MM cameras.
We spent a lot of time (Sam, Torsten Edelmann, Emil Kraikaamp & myself) making sure we had a good capture program before Pat & I left home for an imaging trip North: most of this testing was done indoors, checking the camera’s operation under artificial light using FireCapture & discussing the merits of various suggested control options.
Back then SharpCap was the only other real capture program & it was very basic indeed: Torsten, who already had a very good reputation from his FireCapture software with ccd cameras agreed to adapt it for ZWO cameras. This was even though he was winding back his program’s interface with Windows Media Player based cameras – back then there was no SDK for ZWO cameras & the ASI cameras initially used WMP, although a lot has changed since then!
I was much more the practical member of that early team of enthusiasts, the other members being far more technical – but I do remember insisting on some requirements once or twice lol because as a practical person I felt that the average user would want easy & reliable capture options.
Language was sometimes a problem with 4 people speaking different languages & explaining technical aspects via emails to each other, although I was the only one who spoke only one language: fortunately for me all the others spoke or wrote English well!
The planets were low in the Southern Hemisphere then also, but the trip we had already planned to Northern Australia to help with the elevation of the planets was the best opportunity for us to try this camera: none of the others in the “team” could image at the time so we felt under a bit of pressure & it was still a rush to get the first ZWO camera ready before we left home.
Even when we arrived up North I was still a bit dubious about using it because all good planetary imagers are very demanding about their images & I was worried this camera might not be an improvement…but after a few days I thought it was silly to hesitate & the only way to find out was to give it our best shot if a good night presented itself.
A few nights later we knew we had a winner when we experienced some good seeing & much detail was obtained, even though Jupiter was only about 47° elevation.
Possibly the first ever “hi-res” images of Jupiter taken with an ASI120MM, captured on a good night in The Northern Territory. (Australia)
The images I posted on the large US AA forum “Cloudy Nights” went viral…many people wanted to know how a cmos camera could produce such amazing results from very modest elevations compared to the ccd camera images around – & also possess such good frame rates! At that time (2012) all the very good images were coming from the Northern Hemisphere where Jupiter was high in the sky!
Of course the capture parameters as well as my processing skills were much poorer back then – learning to better control this camera to achieve higher frame-rates etc meant more improvements in the outcomes as we learnt more about this new unit.
This cemented our relationship with Sam & ZWO & our love for his cameras! 😉
Over the next couple of years our images continued to amaze other amateurs, we were the first amateurs to image Saturn’s Polar Hexagon with the ASI120MM-S…people everywhere were simply astounded that we were capturing this relatively dim planet (compared to Jupiter or Mars) at nearly 200 frames per second back then!
We captured the first ground-based images of Saturn’s amazing North Polar Hexagon in January 2013 since the Pic du Midi did so in the late 1980’s – with an ASI120MM-S & followed this up with a composite image taken from 3 separate colour images over 10 days to create another “first” – a Polar Map revealing the complete hexagon.
We started imaging other planets besides Jupiter & Saturn, such as Mars – all with excellent results, then Uranus & Neptune also. Neptune is probably the most difficult planet to image successfully, but initially when using the ASI174MM Pat & I astounded the amateur world & professionals by capturing several storms on Neptune: these images were presented at that year’s International Planetary Scientists Convention in Washington DC, USA where the presenter noted that “except for some small artifacts our images matched that of the Hubble Space Telescope’s, detail for detail” – & it was also the only amateur image to capture a particular southern storm only picked up by the HST – all this from a C14 & ZWO camera!
The following picture is an ir-rgb image of Neptune from 2015 described at the following International Planetary Scientists Convention in Washington DC as “except for some small artifacts accords point-by-point with the HST images” – & besides the Hubble the only image to reveal the storm (Bright Spot) in the South Polar region. (bottom spot)
Neptune’s ongoing challenges & our passion for the most difficult of tasks came to the fore again in 2017 when we were the very first (amateurs or professionals) to image the Equatorial storms on this planet, where previously none were thought to exist due to the ferociously fast winds there: our C14 & ASI290MM camera even beat the giant Keck telescope in Hawaii to image it, weeks before that enormous telescope did so, proven by our report at the time we imaged it!
Q5: Which ASI camera is your favorite? And why do you choose it?
Too hard to answer honestly…the ASI224MC is a fantastic colour camera which allows for the easy use of an ADC & it has very low noise – when clouds make mono camera image capturing difficult it is a very good “fall-back” for people like us who usually employ one of the ZWO mono cameras. Of course the ASI290MC is another like this & people who like Solar or Lunar imaging do opt for those models with larger sensors to cover greater areas on these targets, such as the ASI174MM & other newer cameras, but for us our standard camera is the ASI290MM mono camera with the ASI224MC as a back-up for when passing clouds are an issue. 🙂
Q6: Is planetary imaging your favorite? What setup do you use currently? Could you share a picture of your setup?
I use a Celestron C14 SCT on an EQ8 mount head atop an aluminium pier I made myself: a Stellarvue 10x60mm finder/guide scope is our latest refinement to make targeting Neptune easier, we often travel around the wide countryside of South Australia & even further around Australia towing a caravan with our 4WD vehicle: we have portable power & stop at favorite places where the seeing can be good to image the planets, enjoying the countryside as well.
Our telescope is equipped with a primary mirror temperature gauge & we are very particular about having the mirror at equilibrium to the air temperature at the time of imaging: we are very careful about both collimation & focus as well to ensure we obtain the best results, whatever the seeing conditions are.
Q7: What are the advantages of an SCT in planetary imaging.
Their long focal length provides good image scale (size) for the planets & they are also very compact for their aperture.
Despite what is said they are the easiest scopes to collimate – & it is essential to collimate a scope to the highest degree whenever possible to ensure the optimum image results: SCT’s are collimated on an actual star near the planet you wish to image via the same programs & computer you will be capturing your planetary images on after you have completed this initial stage.
They are also easy to cool down to get the primary mirror to the same temperature as the outside air temperature, even when the air temperature is around freezing point: Pat & I have devised several effective methods of doing this.
Q8: What is the hardest part in planetary imaging? And how to resolve it?
This is a difficult question to answer because after atmospheric “seeing” much of it depends upon the level of skill of the imager: this is why I always try to give people any information they ask about on the forums or when they contact me via email etc on our website. I also place specific processing tutorials on our website, such as how to achieve good collimation & also the basics of processing planetary captures with the ASI224MC etc.
http://momilika.net/
Obtaining a well-balanced image without over-sharpening, coloration, avoiding or removing artifacts such as the dreaded “rind” or “diffraction” artifact on Mars without obliterating or falsifying the data spring to mind…or eliciting the moons around particular planets, keeping the Crepe Ring intact for Saturn etc: there are many articles that I have posted on also, particularly on the Cloudy Nights AA forum…adding more of these is an ongoing task for our website too – although trying to keep it up to date is also a difficult task! 😉
Q9: ADC is a very good accessory for planetary imaging. But it can be hard to calibrate it. Could you share us some skills in using ADC?
Not a lot except to say here but note that an SCT makes using an ADC very easy: the reference null-point for the levers only has to be positioned in a horizontal position relative to the ground on the left or right, depending upon the individual ADC.
The levers are then adjusted outwards from each other accordingly to counter the dispersion – which the “ADC Tuning” tool in FireCapture makes very easy…my most worthwhile advice is to advise people interested to look up internet information: Martin Lewis from the UK being one of – if not the best – references & overall information sites around!
Q10: What’s your impression of ZWO?
I think my comments here affirm just how much admiration for Sam & ZWO – he has revolutionized planetary imaging options in my opinion & that in my opinion is not an overstatement! 🙂
You photos are fantastic. Thanks a lot for your time! Clear skies!

People are asking the connect methods of ASI2600MM Pro: How to use it with the new 36mm EFW? How to reach the 55mm back focus distance? What accessories I need
Hello Andrea Arbizzi,thanks for accepting our interview invitation. Congratulations on winning the ASIWEEK competition in week#42/2024! Q1: At first, congratulation that your nice image won #ASIWEEK. Can you introduce yourself
Hello Peter Dunsby,thanks for accepting our interview invitation. Congratulations on winning the ASIWEEK competition in week#46/2024! Q1: At first, congratulation that your nice image won #ASIWEEK. Can you introduce yourself
Hello Juzelle Jardin,thanks for accepting our interview invitation. Congratulations on winning the ASIWEEK competition in week#45/2024! Q1: At first, congratulation that your nice image won #ASIWEEK. Can you introduce yourself
Hello Kevin,thanks for accepting our interview invitation. Congratulations on winning the ASIWEEK competition in week #41/2024! Q1:At first, congratulation that your nice image won #ASIWEEK. Can you introduce yourself to
2 Comments
maicon germiniani
Great Interview. Avani Soares from Brazil, is another user of ZWO cameras. Look his images: https://www.astrobin.com/users/astroavani/
Avani Soares
Wow!!
I loved the interview and especially the opportunity to know a little more about this exceptional astrophotographer Darryl.
I can say that I practically only used ZWO cameras starting with ASI 120MC, then 224 and currently using a 290MC. I have never tested a monochrome camera and would love to try an ASI 174MM in lunar and solar, which I have not yet been able to.
Once again congratulations for the excellent work done in astrophotography and without any shame I can say that Darryl and Chris Goo have always been my main reference.
Long and prosperous life, keep presenting us with these superb images that you can do so well!
Avani