What is pixel binning? What can you do? How do you do it? We see astrophotographers from all over the world asking these questions everyday. In this article we are going to explain how you can start binning your astro photos.

1. What is it?
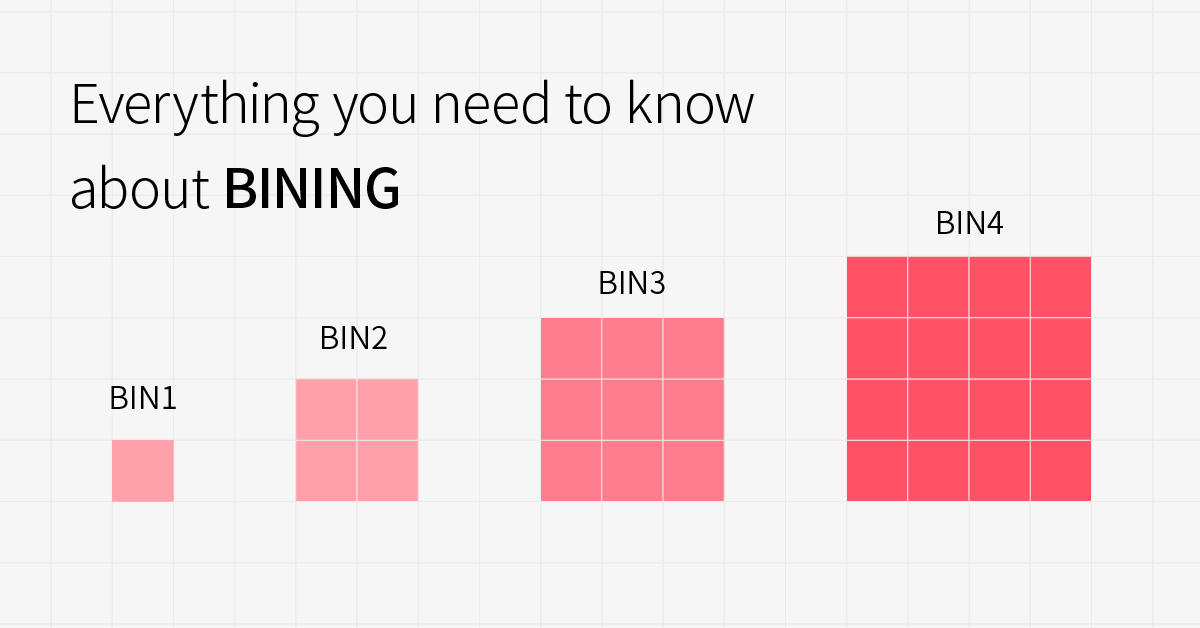
Binning is when you merge adjacent pixels into one larger pixel. Most commonly in a 2×2 formation, where 4 pixels are combined through software to make one large pixel as shown in the figure below.

Bin1 VS Bin2
Something you will notice when you bin 2×2 is your camera resolution is quartered as you effectively have 4 times less pixels. This also doubles the signal-to-noise ratio.
Binning 2×2 or even up to 4×4 can be a very effective way of framing and focusing your target. This is because the larger pixels gather light much faster, revealing faint nebula and galaxies in shorter exposures.
2. Mono BIN

Mono binning is an option for colour cameras, if selected, the color camera will ignore the information of the Bayer matrix and select the closest pixel value to merge and get a grayscale image. This will result close to the image of a monochrome sensor but it is important to remember you only get a quarter of the resolution.

3. CMOS BIN VS CCD BIN?
CCD and CMOS have different readout methods, and the areas where pixel binning occurs are also different. The pixel combination of CCD takes place in the analog domain, and analog signals can be combined.
Suppose we have 4 pixels here, the readout noise of a single pixel is 1x, it needs 4 readouts before BIN2, that is, the total readout noise is 4x.
According to the pixel merging rule of CCD, after BIN2, 4 pixels need to be read out only once. Therefore, the total pixel readout noise after BIN is 1x. Seen in this way, it means that the total read noise becomes 1/4 of the original. Without considering other noises, the signal-to-noise ratio becomes 4 times the original.
The pixel merge of CMOS occurs in the digital domain, and the analog signal has been converted into a digital signal. At this time, the pixel merge can only be completed by software.
As above, suppose there are 4 pixels, the readout noise of a single pixel is 1x, it needs 4 readouts before BIN2, that is, the total readout noise is 4x.
According to the pixel merge rule of CMOS, after BIN2, the total read noise becomes the square root of the original read noise, that is, x=2x. In other words, the total read noise becomes 1/2. Without considering other noises, the signal-to-noise ratio is 2x the original.
At first glance, it seems that the effect after CCD BIN is better than that after CMOS BIN, but here we combine the actual data and simply compare the read noise of ASI6200 (CMOS camera) and KAI11002 (CCD camera):

Since the original pixel size of ASI6200 is 3.76um, the pixel size after BIN2 is 7.52um. The popular KAI11002 pixel size is 9um. The two pixels are relatively close in size, so it is fair to compare the two cameras.
It can be seen that even after BIN2, the read noise of a single pixel of ASI6200 becomes twice the original (please note that 1 pixel after this BIN2 is equivalent to the original 4), the maximum 7 electrons are also lower than 10 electrons of KAI11002.

Similarly, looking at the comparison between ASI1600 and KAF8300, although the pixels of AS1600 at BIN2 are larger than BIN1 at KAF8300, the read noise is still lower.
Since the read noise of the existing CMOS is much lower than the read noise of the CCD, even after BIN2, the read noise of a single pixel is still very small. And we actually ignore the fact that the effective signal itself is noisy, we call it shot noise, and the shot noise will be reduced to half after BIN2, so the fact that BIN will increase the signal-to-noise ratio, whether it is CMOS or CCD will be very obvious.
4. Hardware VS Software BIN
After comparing CMOS BIN and CCD BIN, let’s look at another concept of BIN- hardware BIN and software BIN.
Hardware BIN, as the name implies, is to merge the pixel with hardware, usually refers to the completion of pixel merge on the chip, due to the different chip structure, CCD can do this, but CMOS cannot. CMOS hardware BIN is more like pixel skip. The frame rate will be faster by pixel extraction, but the signal-to-noise ratio is limited. Generally, we apply it to scenes that require high frame rates, such as shooting solar system objects. For deep space shooting, we recommend binning with software on CMOS cameras.
Here we also defines hardware BIN as pixel merge on CMOS sensor, and software BIN as pixel merge in SDK in software. Please notice it is not the same BIN as CCD on chip BIN.

In our ASCOM and ASIImg, ASILive software, the default BIN is software BIN, only ASICAP have hardware BIN option. You can find this option in ASICAP->Control->More (provided that the camera supports hardware BIN).
5. What is the difference between BIN with RAW8 and RAW16?
The calculation method of software BIN is different, you can take the average of adjacent pixels, or add up the pixel values. In the RAW8 format, we use the accumulation method, the image will become brighter; RAW16 under the average method, the image will not become brighter, but the image signal-to-noise ratio is improved.
Add up BIN

As BIN increases, the brightness of the image also increases.

But at the same time, the resolution is also declining, and the details of the letter “PCO” in the picture is losing.
Averaged BIN
Taking ASI294MC as an example, select RAW16 in ASICAP, the image is saved in 16bit, and the average of the original pixel value is taken after BIN.

BIN1(4144*2822) VS BIN2(2072*1410)
In this case, the number of pixels in BIN2 is also reduced to 1/4, and the resolution and details are also reduced. The only difference from RAW8 is that the brightness is not increased, but if you look closely, you will find that the noise is reduced.
6. When to use BIN?
Generally, we will use BIN to improve efficiency when focusing and framing. If the system is oversampling when shooting, BIN can also solve the problem.

So, should we use BIN in the process of shooting deep space with CMOS camera?
Because CMOS cameras all use software BIN during deep space shooting, image post-processing can also complete this process.
If you confirm that the image is oversampled, you can use BIN to get the suitable sampling, otherwise we still recommend to keep the original image during the shooting process, and you can decide use BIN or not in post-processing.









29 Comments
GUY
Hi,
You say: “the larger pixels gather light much faster”
So, how faster it would be comparing bin 2×2 and bin 1×1? 1.5x, 2x faster for the same target?
I know the resolution won’t be as good with bin 2×2 but if i purch your 6200MC pro camera with 16mp at bin 2×2 is still a very good resolution!
Moson
Sorry we don’t know exctly how faster it would be.
Alexandre Zanardo
Can Cmos chip bin the pixels only in one way, like horizontal or vertical? Like: bin 1×4 or 1×2? This is very useful in spectroscopy and I would like to know if is possible.
Katherine Tsai
Sorry, ASI software does not support this.
John Ellsworth
Thank you for this explanation. I got what I needed—I now understand why it is recommended I use BIN 4 for focusing (and framing).
ZWO.Moson
You are welcome.
Graham Wilcock
So for deep sky with 2×2 binning with mono CMOS sensors, to get to the correct sampling level, the advice is to:
1. Shoot unbinned at 25% of usual exposure time. So if 4-minute exposures are normal for a target, take 1-minute exposures.
2. In post-processing, bin 2×2 each exposure before stacking, summing to give 4x the signal.
3. Stack each channel.
With LRGB imaging, the L channel if unbinned will be 2x the size of the RGB channels. This size difference would then be compensated for in the next integration step.
All channels would be correctly sampled and there would still be the advantage of shorter capture times for the binned channels.
Is this correct?
ZWO.Moson
We suggest you join our Facebook team: https://www.facebook.com/groups/zwoasiusers/
gammerpc
“For deep space shooting, we recommend binning with software on CMOS cameras”
or
“If you confirm that the image is oversampled, you can use BIN to get the suitable sampling, otherwise we still recommend to keep the original image during the shooting process, and you can decide use BIN or not in post-processing.”
Hard to know what we should do in the end.
So far on my ASI183GT I have been binning 2×2 but now when I get my ASI6200MM Pro (mono) I am not sure to BIN or Not to BIN.
I am taking all my images with MaxImDL 6 Pro and seem to work really well with ASI Cameras.
Support@ZWO
Thanks for your feed back. If your shooting condition is met, I recommend not to bin.
aleksey.kalyuzhny
It seems that RAW8 and RAW16 are mixed up in the article above when comparing “Add up BIN” and “Averaged BIN”. There is no sufficient dynamic range in RAW8 to add up pixel values, but the avarage value would fit the 8-bits
Support@ZWO
This is our calculation method of software BIN. Generally, RAW8 is for planetary photograph, it’s better reducing expose time and gain.
gammerpc
“we recommend binning with software on CMOS cameras.”
When I select 2×2 Binning in MaxImDL 6 Pro is the Software Binning or Hardware Binning?
Thanks,
NoDarkSkies
Support@ZWO
no Hardware Binning in MaxImDL 6.
CAYRIER
Hi,
having an asi183 mm on a 200/800 newton.
Sampling is 0,6″ /pixel, difficult for long exposure.
Is it a good idea using binning 2×2 in this case ?
Support@ZWO
If you confirm that the image is oversampled, you can use BIN to get the suitable sampling, otherwise we still recommend to keep the original image during the shooting process, and you can decide use BIN or not in post-processing.
Brian
Can you guys comment on the bin1 vs bin2 mode on the ASI294MM Pro? Is there any difference between normal software binning?
Kevin Waddell
I recently binned 2×2 on my asi2600mc pro to improve my image scale as I was shooting at 1645mm FL. I selected the option in Nebulosity>advanced camera settings. I thought this was software binning (?) but the resulting images had no color information.
I was not able to recover it, but had some great Luminosity! I plan to shoot the same object again in 1×1 to get the color back…how would I do software binning after I’ve captured them to retain the color information?
Support@ZWO
Can you replicate this in ASIStudio?
Kevin Waddell
I’ll have to try as I don’t use ASIStudio. I guess my question was what software is used to do software binning?
I know CMOS doesn’t actually do hardware binning..it is more like pixel skip…but if it is done in the camera drivers the color information is lost
Support@ZWO
Software through ASCOM.
Kiroul
Hello, is software binning or hardware binning used during BIN2 guiding in PHD2 with ASI224mc ?
Thanks , Pierre
sara.liu
The ASI224MC supports both software binning and hardware binning.
It depends on your software.
Gavin
What is the maximum binning on a 120mm mini mono?
sara.liu
Bin 2.
Haozhe
Hello, many thanks for this excellent article. So is there any difference in using a camera with small pixels but binning it from using a camera with large pixels without binning?
sara.liu
Yes, they are different.
A camera with large pixels will be more realistic.
Peter
I have an ASI294 and when using autorun it seem that a Bin must be selected. Is that correct?
sara.liu
Yes, the default Bin is Bin 1.