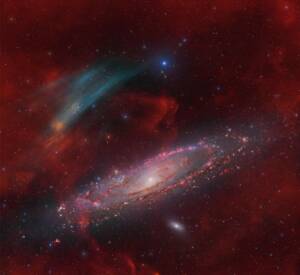
Discovery of the M31 [OIII] emission arc
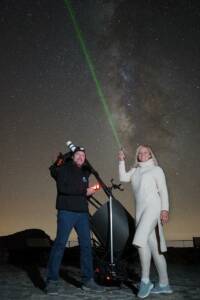
Recently, a major discovery by an international team of amateur astronomers and scientists has become a huge online hit, and this new discovery is just located in one of the
ASIStudio software is a welcome addition to the astrophotography software workplace. It integrates various astrophotography software into one easy to use system. The results are rather pleasing. ZWO has decided that a few camera functions are too complex for amateur astrophotographers and provide factory set defaults. This version (1.4.1) is essentially a beta should continue to improve.
There are other standalone programs available that can be used by ZWO cameras. At one time ZWO offered SharpCap on their software support site for capturing and processing images. SAOImage DS9, an easy-to-use professional FITS file viewer is freely available. There are many others as well that contain fuller features some with considerably increased complexity.
The biggest downfall is that ASIStudio works only with ZWO cameras. This guide has settings specific to the ASI183 cameras. ASIStudio, however been written for all ZWO ASI cameras.
Key hardware features of the ASI183 cameras are available online on the ASI183 Manual. For convenience, most of the key features are detailed below. It is readily apparent that some features are not easily addressed in the software or for which amateurs and even some professionals fail to understand fully, such as gain and offset. The software selections and assumed settings are reasonable for backyard astrophotographers.
Hopefully, this documentation will be easy to update when either the device driver or the suite itself is updated.
The ASI183 camera series consists of four cameras. The ASI183MM camera is monochrome and uncooled, the ASI183MC camera is color and uncooled. There are also the PRO models which are identical to the monochrome and color cameras but include a cooling unit. The cooling element decreases systematic noise but adds significantly to the cost of the camera and further requires its own power supply.
All four cameras are 20.18 megapixels with a one-inch diagonal CMOS chip. Each pixel is a square 2.4 micrometers. This smallness of the pixels has both advantages and disadvantages. Obviously, its size means more pixels can be packed on the chip leading to increased resolution. Its small size, however, means it will be prone to oversaturation as well.
The published exposure range is 32μs-2000s (0.000032 seconds to 33.3 minutes.) Compare this with a great camera with a minimum exposure of 0.001 second. The hardware is capable of any exposure time within the range. The ASICap program allows you to set the lower end of 32 microseconds if required. For the other capture modules, 0.001 seconds is currently as fast as you can set. If you need long exposure times, you can set the exposure up to the full 2000 seconds.
Quantum Efficiency (QE) is a measurement of how well light is captured by the pixels. The overall peak QE of the ASI183 cameras is 84%. There are unequal QE values for each of the three colors and QE goes down to a barely acceptable 60% for hydrogen alpha lines. The camera is most sensitive to greens, followed closely by the blue and reds. This closely matches the sensitivity of our eyes.
There is a reported problem with amp glow with this camera. A cursory examination of my bias and low gain-fast shutter darks does not exhibit the problem. However, amp-glow starts showing up with slower shutters and higher gains as well as higher binning. At some combination amp-glow may become untenable. The glow on the right of the image below is the that I recorded using high gain and a long exposure. If not too severe, it can be neutralized by software processing.

Amp Glow with a long shutter, high gain setting
Another problem reported with the camera is hot and dead pixels. I found one red and one green hot pixel on my array which is excellent considering this is two of 20 million! Closer inspection may find more, of course.
The ASIStudio suite version 1.4.1 is described in this manual. It includes all five software processing modules.
ASICap specializes in solar system astrophotography and provides most of the user settable camera functions. ASIImg specializes in deep space astrophotography. ASILive displays live frames on your computer allowing you to adjust various parameters on the fly before capturing an image. It also allows you to take calibration frames for your session. ASIFitsView displays 16-bit FITS files. ASIDeepStack is ZWO’s stacking program allowing one to process images, darks, flats, and bias frames to gain the best signal to noise ratio (SNR) possible.
This module allows you to set most camera settings. The settings button (gear) does provide several useful settings. Pressing this button brings up a dialog box with four sections.: General, EFW, ST4 Autoguide, and EAFocuser.

Check the appropriate check boxes as you wish. EFW is for ZWO’s filter wheel, and EAFocuser for ZWO’s auto focuser. Leave these unchecked if you do not have the equipment. The ZWO cameras are capable of being used as auto guiders, and the ST4 Autoguide tab sets the parameters for this specialized use. Select the “object” of the solar system target. If your target is not listed, you can specify it yourself. The object name will be used as a folder name for capture frames when using ASICap.
Select WINJUPOS for a file naming convention generally in use. If you want 16-bit TIFF files check the box. I recommend, however, you use FITS files for Raw16 files as these can be used in other modules, to include professional astrophotography analysis programs. For FITS files, make sure the option for 16-bit TIFF files is unchecked. Use DPI Scaling only if it improves your visuals.
In the Camera section, use the dropdown to select the camera and check the “play” button to start. The recycle button refreshes camera selection in case you have more than one. The information button displays the capabilities of the camera.

In the Image section, check the format button for either Raw 8 (which produces 8-bit PNG files,) or Raw 16 (which produces either 16-bit TIFF or 16-bit FITS files.) While TIFF files are generally more transportable than FITS, FITS is a format used by most professional astrographic software to include the remaining modules of ASIStudio. Select Bins as Bin1, Bin2, Bin3 or Bin4. Binning “glues” pixels together to form larger pixel sizes at the expense of lower resolution. This may help resolve oversampling problems. The only camera hardware binning available are Bin1 and Bin2 which must be chosen in the Control Section below should you want it. ZWO recommends, however, binning in software should you need it. Remember that bin2 requires four pixels in the horizontal, and four pixels in the vertical for a pixel group. Bin3 requires 6 pixels in each dimension for its pixel group, and bin4 requires 8 pixels in each dimension. This considerably reduces the resolution but might help alleviate oversaturation. Higher binning, however, results in higher amp-glow. Finally, chose the resolution from the drop-down box. The rectangle to the right of the resolution entry automatically resets resolution to the maximum.

The Histogram section shows the saturation levels of the image.
In the Control section, you can manually set the exposure time and gain. The exposures can be set from 32 microseconds to 2000 seconds. To easily set the exposure, use the drop-down range list to select an appropriate range. Then use the slider bar to set the exposure. Gain is set from 0 to 450 using the slider bar under the gain setting. Use a low gain for long exposures, and higher gains for short ones. Note that the offset is automatically set by the firmware based on the gain. The auto buttons automatically set the exposure and the gain.

The three-dot button brings up a dialog box for advanced Camera, Color, Temp, AutoExpLimit, and ST4 guide settings. The camera tab allows you to set options which you should normally be left to “Auto” or default. Note here, however, is where you can force hardware binning. The same is true for the other tabs as the default is probably the best.

In the Capture section, set the path you want to use to store your images. Limit defaults to no limits, but you can use it to limit file storage: Seconds for video and number of frames for camera. The raw data check box is available only for Raw8 images or 16-bit TIFFs. Pressing the camera icon starts the capture process storing the frames. Pressing the video camera takes videos (AVI for 8-bit and SER for 16-bit.) The Autorun button brings up an exposure regimen for multiple actions that you may want.

In the Display Control section, you can adjust gamma, contrast, brightness, and saturation. You see the results on the display, but it does not change the file.

Right-clicking the image area pop up a menu allowing you to flip the image both horizontally and vertically, pan in or pan out of the image, bring up a reticle, save the displayed image, fill the window with the image or full screen the image. This function is available in all the processing modules, not just ASICap.
The ASIImg module is designed to image deep space objects (DSO) such as nebula clusters, and galaxies. This module is designed for longer exposure times lower gains. It is not suitable for solar system objects.
In general, good long exposures require you to set the “best” exposure time and then to adjust the gain to minimize noise. The “best” exposure time can be estimated by taking preview frames until the object of interest is seen on the display. Then adjust the gain for minimum noise. With this specific camera, some astronomers have found a 30 to 60 second exposure time will work well with brighter DSO objects.

Select your camera from the drop-down list. The play button turns on or off the camera. The recycle button recycles the list of available cameras. The “I” button provides information about the camera.
Set the resolution and gain as appropriate. Unlike ASICap, there is no button to set the maximum resolution, nor are there options to select format. Images are 16-bit FITS files. The maximum resolution is 5496×3672 but can be changed selecting another from the drop-down box or check the custom setting. The provided resolution options should be sufficient for most applications. The gain is limited to low, medium, and high and the offset is set by firmware. As exposure times may be lengthy, a gain of low to medium is probably best.
Set the exposure in the range from the drop-down box.
Set the bin size to bin1, bin2, bin3, or bin 4 as required.
If you have the PRO model, check the Cooler button, and enter the desired temperature.
While adjusting the exposure, gain, or binning, make sure you are running on preview mode. Check single image or continuous as desired. The Single button reacts like a live image through an eyepiece. Continuous will automatically capture the frames and replace the old ones. When ready, press the capture tab which currently brings up only one option: Autorun.

Autorun allows you to set up a script for taking images.
Ordinal the number of the script command lines, it requires you to set the type of exposure desired, light, dark, flats, or bias frames. Exposure(s) is to set the exposure time. Repeat sets the number of frames to be taken, and status shows the status of the currently executing ordinal bundle. The minus sign removes an ordinal, and the plus sign adds a new one. The “Delay First” check box initiates a time delay to allow the telescope to achieve stability. Set the delay time if required. Check the “Delay Between” check box and set the time delay between ordinal executions if necessary. Start begins executing the script.

With this module you can observe live stacked views using your computer monitor, create calibration frames, take light frames, stack the results, fine adjust the resulting light (image), and save the results.
The Camera settings are identical to ASIImg.

The Stack subsection select target which I set to ASILive. Select the Type and type exposure from the drop-down box (light, dark, flat, bias). Choose the output folder either by typing it in or using the folders button.

Stack advanced options, the three-dot button is only active for lights. Pressing this button brings up a dialog box allowing you to choose a bias file, a dark file, and a flat file for processing. Other options a check box toggling removal of hot pixels, auto-alignment light frames, marking stars, FWHM filter, or auto-saving single frames during stacking. This latter check box can chew up a lot of hard disk space. If auto-align is selected, the light must contain three or more stars to properly align the frames.

If the memory is running low, you can clear the stack using the broom or undo the last stack using the back arrow. The play button starts and stops the stacking. This is particularly useful as the camera is always sending data to the computer.
To stop the process, press the play button again. Use the contrast, brightness and saturation controls as required. Stretch or compress the histogram to further process the displayed image. When OK, find the Vertical Too Bar on the right side of the image and select the floppy disk icon to save the image.

The ASIFitsView module simply displays 16-bit FITS files.

The primary advantage of FITS files is that the format has been used by astronomers for decades and is a raw format that can be processed and analyzed using professional software which can be used to measure variability among many other functions. As FITS files are raw, all information collected in each pixel is preserved. The major disadvantage of this module is that it only supports 16-bit FITS files. An alternate free fits viewer is the professional, but free, SAOImage DS9 which has many more options and can display any FITS file.
After getting your light (images), darks, flats, and bias file saved through ASILive or the other capture modules, the remaining process is a breeze. Firstly, load your bias frames selecting the Bias tab, flat frames selecting the Flat tab, the Darks into the Dark tab, and your images into the Lights tab. The calibration files can be masters, but the lights should be individual frames. Select the output folder and press the play button. The icon to the right switches the display between the stacked mode and the single frame mode.

ASIDeepStack only accepts 16-bit FITS files.
The calibration frames can be the individual (unstacked) frames or a master frame which are stacked individual frames.
Press the Play button to start the process. This will bring up a nice status window informing you of the progress. Also, in the lower portion of the window, the status of the stacking is displayed.
The below diagram from ZWO shows the general flow of the process.

Once all frames have been processed, you can adjust the histogram values which affect the displayed image. If what you have done “ruins” the result, use the reset button. Auto has been reported as a fine tool for producing good histograms. You can adjust the brightness, contrast, and the saturation of your image. There are also slider bars which will stretch or compress the histogram from either the left or the right.
If the image is still noisy, check the noise reduction button. If you are about ready to give up and start over, press the Default button.
To save the processed image, right click the image area and click the floppy disk icon. This will save the image in both JPG and FITS formats.
Every frame captured by the camera will contain your desired image (light) and five types of noise: Read noise, Dark current, uneven pixel responses, optical path noise (such as dust on the lens) and random noise. Calibration frames are taken and used to increase SNR.
Stacking, which takes averages, reduces random noise. Although not normally considered a calibration frame, it is a calibration step. The more frames stacked, the less random noise in the stacked image. There is a tradeoff here between processing time and the degree of random noise.
Calibration frames are:
Bias: This is the noise introduced by the electronics when a pixel value is read out. This is commonly called “read noise.” Since this only involves read issues, ideally, a bias is taken at a zero second shutter speed. As this is impossible, the bias should be taken at the fastest shutter speed available. The bias is also affected by gain so bias frames need to be taken at various gains. The resulting frames are not volatile, i.e., do not change over time, but many choose to retake bias frames from time to time. A stacked bias frame is commonly called a Bias Master, and this Master is used for calibration.
Darks: Unlike bias frames, these are taken at the specific resolution, shutter speed, gain and temperature of the target light (image). These frames record the dark current inherent in electronics. They also contain the bias. Stacked dark frames are commonly called Master Darks. Note that darks are specific to your image. And should be taken along with your lights. Dark flats, on the other hand, are simply dark frames for the flats. These frames depend on the exposure, gain, and temperature of your flat files. For fast shutter speeds, the dark flat may be approximated by the bias and this assumption is made by ASIDeepStack processing.
Flats: These are taken at the specific resolution, gain, and temperature as the lights (images.) These normally use fast shutters and need to be taken through the telescope and the complete optical path. They also contain the bias and the dark current of the system. This dark current, however, is not the same as the dark current in your image and so requires its own dark. However, since bias frames contain the bias as well as short exposure dark current, a bias frame can usually double as a dark flat. ASIDeepStack makes this assumption.
Creating Bias frames should be one of the first tasks for your camera and software. Bias is noise when reading out a pixel value, so these frames are obtained by setting the exposure time to minimum, setting the resolution and gain, covering the lens with the lens cap, and shooting a series of frames: normally 30 is more than sufficient. These frames can be taken without attaching the camera to the telescope as the optical path does not affect read noise, Bias frames are non-volatile and can be reused. Stacking the individual bias frames produces a master bias image. The capture modules ASICap, ASIImg, and ASILive will automatically stack these for you. Examine the master bias using ASIFitsView to visually verify the frame. It should not look very pretty, primarily black with perhaps some horizontal and vertical lines and a visual indication of amp glow should the later be a problem. If the master bias looks good, delete the individual frames, and store the master in a directory of your choosing. A master bias catalog can be formed with a {resolution, gain) structure for ease of use.
The dark frame is more volatile than the bias frame as it is designed to remove dark current errors from the image and depends on exposure, gain and temperature but not the optical path. The darks are obtained by setting the gain and exposure time to that of the image, covering the lens cap, and taking 30 or so frames. The best you can do with temperature is to take the darks right after the images. These frames are then stacked to form a master dark for that image. The individual dark frames can be used as well. The resulting dark is then subtracted pixel by pixel from the image.
When using a professional grade telescope, we took darks and flats at the end of each session. To take darks, we shut the dome and took pictures of the dark. We then turned on all the lights and pointed the telescope to the white wall of the dome. Each subsequent flat was taken at the same settings as the lights, but with a fast exposure. (Do not want to oversaturate the pixels.) This is a good time to take flats since the settings are already set and hopefully dust, etc., has not had the chance to migrate.
There are various ways to take flats. The above are dome flats. There are also twilight or dawn flats where the telescope is turned to a cloud free portion of the sky away from the sun at twilight or dawn, defocused, and an image taken. For these flats, the sun must be just below the horizon and no stars visible. Dark sky flats are taken under dark skies in a relatively star free area with the telescope defocused. Discussion on the internet involves T-shirt flats where the aperture of the telescope is covered with one or two T-shirts which are then illuminated with a bright light for the flat. In fact, nearly any truly flat surface can be used if is sufficiently uniform. Like a ceiling but one with no texture, perhaps?) Note that flats are a function of the camera and the telescope so flats should be taken through the telescope’s optics.
I have been able to produce good twilight flats for low, medium, and high gains and a shutter speed of 0.01 seconds with no problem. In all cases, once the master has been produced, the individual frames can be erased. (These take up significant amounts of hard disk space.)
Most of the modules use gain settings of low, medium, and high. Low gain is equivalent to 0 gain and an offset of 10, Medium is a gain of 139 and an offset of 30, and High is a gain of 300 and an offset of 50. These are the only gains available to ASIImg and ASILive. ASICap allows you to set gains from 0 to 300, the full range of the camera. In all cases, the offset is set by the firmware and is not accessible to the user. Note that noise levels will be reduced by cooling the camera and so your results will vary if you have a PRO line system.
Low gain dark noise can be used from 0.001 to 2000 seconds. Normally this gain is appropriate for “long” exposures. Examining the darks taken at low gain supports this claim.
Medium gain can be used from 0.001 to about 180 seconds before noise and glow may become a problem. After an exposure of about 180 seconds, the dark current noise becomes increasingly difficult to remove.
High gain can be used from 0.001 to about 120 seconds. For longer exposures, the noise becomes extremely high. Thus, the recommendation to use high gain for short exposures.

Recently, a major discovery by an international team of amateur astronomers and scientists has become a huge online hit, and this new discovery is just located in one of the
Hi everyone. My name is Alex, and I am an astrophotographer. I would like to start by thanking You for choosing my picture among all the great pictures You receive.
Why the Orion Nebula Never Gets Old – Each winter, stargazers return to this cosmic masterpiece to test new skills and relive the wonder. Explore the Orion region’s iconic nebulas,
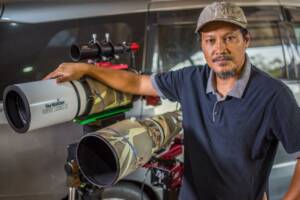
In 1994, I built my first fully functional reflecting telescope in Hungary with my own hands. In the former Eastern Bloc countries, telescopes still could not be purchased in stores
1.How It All Began I have been a fan of astronomy since high school.Starting from a school event where I can see the moon up close through a telescope.When I

1. How It All Began For Puig Nicolas, it all started at the age of 10 with a 60/700 refractor and a 114/900 reflector. His first celestial encounters — the
8 Comments
Wayne
Drop dead spectacular rendition of ZWO ASI 183 and software. This is exactly what I was looking for trying to get started with my new camera. GOOD JOB
Richard
Having read this guide I feel like
Some watcher of the skies
When a new planet swims into his ken
Well done
Eric
I realize the date on this reply is considerably late however it still applies. I’m just starting out using my ‘new to me’ ASI183MC Pro. While using the ASI software, the preview images appear completely BW (Monochrome). What am I missing? Thanks
sasa.wang@zwoastro.com
Please check whether your color switch is turned on. It is the eighth one from the top to the bottom in the right toolbar.
Сергей Николаевич
Rummaged through the entire directory. The question is where is the instruction on the ZWO ASI462 MC where is the instruction for connecting and setting up the camera ???????????????????????????????????????????????????????????????????????????
sara.liu
Here is the link fyi; )
https://astronomy-imaging-camera.com/manuals/ASI462_Manual_EN_V1.1.pdf
Laszlo
I am a huge ZWO fan. I have AsiAir Plus, Asi183MM, Asi6200MM Pro, EFW, ZWO Filters. But I see that your Mac software is still Intel only. When will you start to support the M1 based (much higher performance and more efficient) Macs? They are more than a year old now.
Thanks!
sara.liu
We have tested it on M1, no problem, please try it;D